![]()
前回の記事のようなWordPressの記事内でPHPを実行するには、プラグインが必要となります。
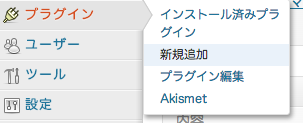
(1)WordPress管理画面メニューの「プラグイン」→「新規追加」を選択します。
(2)プラグインのインストール画面が表示されるので、検索窓に「exec php」と入力して「プラグインの検索」をクリックします。

(3)検索した結果、「exec phpが表示されるので、「今すぐインストール」をクリックします。

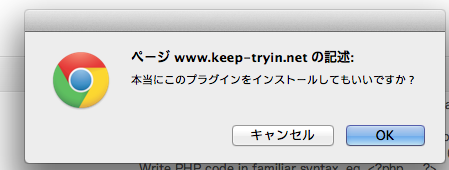
(4)確認画面が表示されるので、「OK」をクリックします。
(5)しばらくするとインストールが自動で完了するので、「プラグインを有効化」をクリックします。
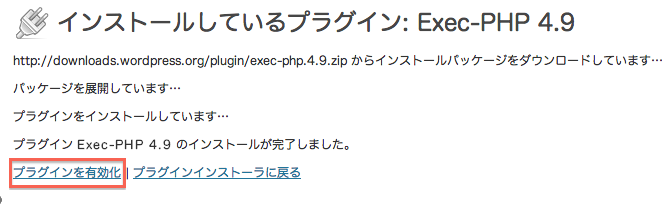
(6)プラグインの一覧で、下記のようにインストールされたことが確認できます。

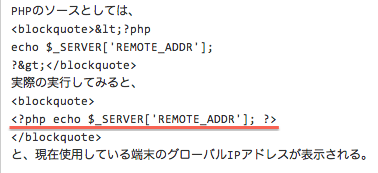
(7)投稿画面で、あとは下記のようにPHPのソースを記述するだけで簡単に使用できます。
※前回の記事から実際の内容を抜粋してみました。
(8)「Exec-PHP」を有効にすると、投稿画面で下記のように警告画面が表示されます。
「Exec-PHP WYSIWYG Conversion Warning. Saving this article will render all contained PHP code permanently unuseful. Even if you are saving this article through the Code editor. You can turn off this warning in your user profile. Ignore this warning in case this article does not contain PHP code. Read the Exec-PHP documentation if you are unsure what to do next.」

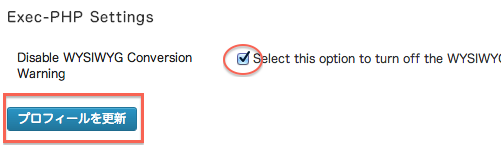
(9)警告画面を非表示にしたい場合は、WordPress管理画面メニューの「ユーザー」→「ユーザー一覧」から、現在編集しているユーザを選択します。
そうすると、プロフィール画面が表示されるので、一番下にある「Exec-PHP Settings」項目の「Select this option to turn off the WYSIWYG Conversion Warning in the Write menu. Nevertheless the recommended way is to switch off the WYSIWYG editor so you can be sure not to break existing PHP code by accident.」にチェックを入れて、「プロフィールを更新」をクリックします。